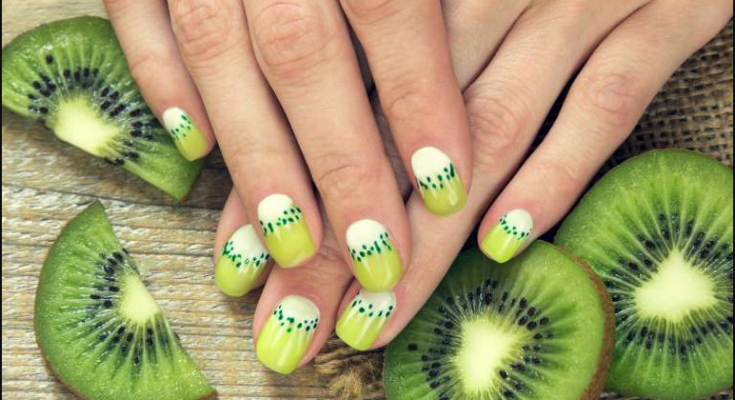
Are you ready to add some creativity to your nails? DIY nail art is a fantastic way to express yourself, and the best part is—you don’t have to be a professional! With just a few tools and some patience, you can create salon-worthy nails from the comfort of your home.
What is DIY Nail Art?
DIY nail art involves using different techniques, tools, and polishes to create unique designs on your nails. Whether you’re into bold colors or subtle patterns, there’s a style for everyone.
Why DIY Nail Art is a Great Skill to Learn
Why spend a fortune at the salon when you can do it yourself? Learning DIY nail art allows you to customize your designs anytime you want, and it’s a fun way to relax and be creative.
Getting Started with Nail Art
Before you jump into creating beautiful nail designs, it’s essential to have the right tools and nail polishes. Here’s what you’ll need.
Basic Tools for Nail Art
- Nail polish remover
- Cotton pads or balls
- Nail file and buffer
- Cuticle pusher
- Dotting tools (or a toothpick)
- Thin nail art brushes
- Tape (for clean lines)
Choosing the Right Nail Polish
A good nail polish makes all the difference. Opt for high-quality nail polishes that have a smooth application and are long-lasting. You’ll need at least three colors: a base color, a design color, and a top coat.
Preparing Your Nails
Before starting any nail art, proper nail preparation is crucial. Here’s how you can get your nails ready.
Clean and Trim Your Nails
Begin by cleaning your nails with a nail polish remover to eliminate any old polish, dirt, or oils. Trim them to your desired length and file them into your preferred shape—oval, square, or almond.
Push Back Cuticles
Use a cuticle pusher to gently push your cuticles back. This helps in making your nail art look neat and professional.
Applying a Base Coat
Never skip the base coat! A base coat not only protects your nails but also makes the nail polish stick better and last longer.
Simple Nail Art Techniques for Beginners
Starting with simple designs is the best way to build confidence. Here are two beginner-friendly techniques.
Polka Dot Nails
Tools Needed:
- Dotting tool or toothpick
- Two nail polish colors (base and dot color)
Step-by-Step Guide:
- Apply a base coat.
- Paint your nails with the base color and let them dry.
- Dip your dotting tool (or toothpick) into the dot color.
- Gently dot it onto your nails, creating a fun polka dot pattern.
- Let it dry, then seal it with a top coat.
Striped Nails
Tools Needed:
- Thin nail art brush or striping tape
- Two or more nail polish colors
Step-by-Step Guide:
- Apply a base coat.
- Paint your nails with the base color.
- Once dry, use the thin brush or striping tape to create stripes.
- Fill in the stripes with your chosen color.
- Remove the tape (if used) and apply a top coat.
Intermediate Nail Art Techniques
Once you’re comfortable with simple designs, you can try more advanced techniques like gradient or floral designs.
Gradient Nails
Tools Needed:
- Makeup sponge
- Two or more nail polish colors
Step-by-Step Guide:
- Apply a base coat.
- Paint one color onto the makeup sponge and dab it onto the nail.
- Add a second color and blend where the two meet for a gradient effect.
- Apply a top coat to smooth the transition.
Flower Designs
Tools Needed:
- Dotting tool or small brush
- Multiple nail polish colors
Step-by-Step Guide:
- Paint your nails with a base color.
- Using the dotting tool, create small dots to form a flower shape.
- Add smaller dots of a different color for the center of the flower.
- Finish with a top coat.
Essential Tips for Perfect Nail Art
Here are some tips to ensure your nail art comes out flawlessly.
Importance of Using Thin Layers of Polish
Thick layers take longer to dry and are more likely to smudge. Always apply thin, even layers of polish for a smooth finish.
Sealing Your Design with a Top Coat
A top coat not only adds shine but also seals in your design, making it last longer and protecting it from chips.
Troubleshooting Common Nail Art Problems
Everyone faces a few challenges when starting with nail art. Here’s how to fix common problems.
Smudging
Avoid smudging by allowing each layer of polish to fully dry before applying the next one.
Peeling Polish
Polish can peel if your nails aren’t prepped correctly. Always clean your nails thoroughly and use a base coat.
Uneven Application
If your polish looks uneven, thin it out by adding a few drops of nail polish thinner (not remover).
Experimenting with Different Designs
Don’t be afraid to get creative! Try seasonal themes or trendy patterns to make your nails stand out.
Seasonal Nail Art Ideas
You can switch up your designs based on the season—pastel shades for spring, bright neons for summer, or deep reds and greens for winter holidays.
Using Nail Art Stickers and Decals
If freehand designs feel too advanced, try using nail stickers or decals to create intricate looks with minimal effort.
How to Apply Stickers Correctly
Peel the sticker carefully and place it onto your nail, pressing down to remove any air bubbles. Seal it with a top coat to make it last.
Creating a Nail Art Routine
Creating a routine helps in keeping your nails healthy while enjoying fun designs.
How Often Should You Change Your Nail Art?
It’s generally recommended to change your nail art every week or two. This gives your nails time to rest and prevents damage.
Nail Art for Special Occasions
From parties to holidays, special events call for special nails. Create holiday-themed designs or add glitter for an extra festive touch.
The Importance of Nail Care
Even if you love nail art, caring for your natural nails is essential.
How to Keep Your Nails Healthy
Moisturize your cuticles regularly and avoid using harsh chemicals. Give your nails a break from polish every once in a while.
Removing Nail Art Safely
Use a gentle, non-acetone remover and avoid peeling off the polish, as this can damage your nails.
FAQs
- What are the best tools for beginners in nail art?
Start with dotting tools, a thin brush, and striping tape. These are easy to use and versatile. - How long does DIY nail art typically last?
With a good top coat and proper care, your nail art can last up to two weeks. - Can I use regular household items for nail art?
Yes! Items like toothpicks and tape can be used to create simple designs. - Is it necessary to apply a base coat?
Absolutely. A base coat protects your nails and helps the polish adhere better. - What’s the best way to fix a smudged nail design?
If you smudge your design, gently smooth it out with a clean finger or tool, then reapply polish and a top coat.
Conclusion
DIY nail art is not just a hobby; it’s a fun, expressive way to add a little flair to your everyday look. Whether you’re just starting or have some experience, there are endless designs to try and experiment with. So grab your tools, get creative, and let your nails become your canvas!


